Coach’s Corner

TRANSITION TIPS

THE FOLLOWING TIPS INCLUDE THE SET UP BEFORE THE RACE START

Pre-Race Bag / Rucksack or Box

Lots of Triathletes have boxes that they put all their kit in prior to a race.

Box: I bought a collapsible plastic box, which is good for storage and gives easy access to my triathlon kit, however, it is awkward to carry whilst you are trying to walk with your bike. Also, I find you have to remember to put your wetsuit in last otherwise there isn’t much room for anything else.

Rucksack: I would recommend that you get a large rucksack. A rucksack you can put on your back and still walk your bike. Rucksacks also have outside pockets and things that you can attach waterproofs and pins and allsorts to. They are also relatively expandable, so even a wetsuit should fit with some ease.

Transition Opening

When making your way to transition with your kit have your helmet fastened to the tri-bars or handlebars of your bike, so it doesn’t fall off and you don’t need to worry about it.  At most events you will be asked to present your helmet before you are allowed into transition as a form of safety check, therefore, having it at the bottom of your bag won’t be very helpful for either you or the marshal.

Get to transition an hour before it closes and 1 hour 30 minutes before your race starts, if you don’t you will be rushed for time to set up.  It’s better to have extra time waiting around, you can check things / warm up / stretch or just relax before the race.

If you don’t leave enough time and you have anything that needs correcting or particular attention you will panic and forget to do those crucial little things that could make the difference between a smooth transition and a time consuming one.

Setting Up Your Kit in Transition

Once you have found your allocated transition space – a white label with your race number on it will denote your transition place – look for permanent landmarks to distinguish where your bike is located within the transition area.  This landmark could be a tree, an ice-cream hut, or you could be lucky enough to be at the end of a row, but regardless of landmarks you need to be sure what row you are in.

To make identification of your slot easier you could place a bright coloured top or jacket on your bike, some Triathletes attach a balloon to the railing where their bike is held, but be warned some events do not allow such obvious markings so don’t become reliant on these aids.

Bike:

Check that every gear works and the breaks too are working and not rubbing;
Make sure the gear is in the small ring at the front and a middle ring at the back;
Place in the forward position the pedal for your stronger leg.  This is the pedal on which you press down first;
Ensure the tyre pressure is correct for the conditions of the race; (this will be less pressure if it is wet and more if it is sunny but don’t over-inflate the tyre);
Set your speedometer to how you want it to read during the race;
The bike should be securely hung over the railings, either by its saddle or by its handlebars, just make sure you are able to release your bike quickly from the position you select;
Make sure your water bottle(s) is/are full and in place.

Cycle Helmet:

Unclip the helmet from the tri-bars / handlebars;
Place the helmet facing upwards, either on the floor by the side of your bike or on your handlebars/tri-bars, with the straps unclipped and hanging over the side of the helmet, ready for you to put straight onto your head.

Glasses:

If you are wearing glasses place these on top of the helmet with the arms unfolded.

Cycle Shoes:

Place at the front beside your bike wheel with the straps undone;
Shake talcum powder inside so it is easy to slide your feet into them (remember your feet will be wet from the swim). 
You can have your shoes already clipped in with the Velcro straps wide open. 
Tie the shoes with elastic bands so they stay horizontal to make it easier to jump onto your bike.

Running Shoes:

Place beside your bike, with laces undone and the tongue released and folded back;
Again shake talcum powder inside to aid sliding your feet into the shoes. 

Finally:

Have a small towel at the head of where you have placed both sets of shoes for you to stand on, this will help soak up some of the water that will run from your wetsuit;
In the event that it is raining or there is a threat of rain during the race, cover both sets of shoes with a plastic bag, not too tight so that you struggle to uncover the shoes quickly, but tightly enough to keep in place if it is windy.

RACE KIT and EQUIPMENT

PACK ALL OF THE FOLLOWING REGARDLESS OF WHETHER YOU THINK YOU WILL NEED THEM OR NOT.  IT WILL ALL COME IN VERY USEFUL.

ESSENTIAL KIT and EQUIPMENT:

  • Tri-Suit
  • Pre-assigned Race Numbers to be pinned to Tri-Suit, both back and front
  • Safety pins
  • Race belt – not every event allows these to be used, but if you can, use one.

The Swim:

  • Wetsuit
  • Pre-assigned Swim Cap
  • Extra Swim Cap – it is highly recommended that you wear 1 swim cap under your goggles and the race swim cap over your goggles, to eliminate the chance of you losing your goggles in a mass start
  • Swim Goggles
  • Baby Oil – you’ll struggle enough putting the wetsuit on, it’ll slide off with a good helping of baby oil
  • Vaseline – you’ll be amazed where that wetsuit can rub!

The Cycle:

  • Bike – it has been known for this item to be forgotten!
  • Cycle Shoes – fact, this item has been forgotten!!
  • Cycle Helmet – you won’t be allowed to race without it
  • Pre-Assigned Race Number for bike and helmet
  • Sun Glasses – it has been known to be sunny during a British held triathlon!
  • Water Bottle
  • Sports Fuel Gel
  • Talcum Powder – try getting your feet into any shoe whilst wet, let alone cycle shoes!

The Run:

  • Running Shoes
  • Water Bottle
  • Sports Fuel Gel
  • Pre-Assigned Timing Chip – not every event issues these
  • Pre-Assigned Identity Bracelet – not every event issues these

MISCELLANEOUS KIT and EQUIPMENT:

  • Scissors
  • Tape
  • Plasters
  • Antiseptic wipes
  • Bandage
  • Surgical tape
  • Blister kits (2nd skin)
  • Bin liners
  • Plastic bags to put over your shoes if it rains
  • Anti fog spray for swimming goggles
  • Energy gels – at least 4 – and replace for next race
  • Waterproof jacket
  • Towel
  • Flip-flops
  • Bag for wetsuit
  • Windproof for cycling
  • Puncture kit, i.e. Spare tubes and tyres
  • Tyre levers
  • Bike tool
  • Alan keys
  • Pump
  • Lube spray for your gears
  • Gloves for cycling and normal gloves (in case the conditions are wet/cold)
  • Baseball hat (in case the conditions are hot)
  • Suncream
  • Aftersun
  • Toilet paper
  • Pen
  • Space blanket
  • Mars Bar or other food snack (jelly babies)
  • Washing up bowl to stand in whilst you take your Wetsuit off to get the sand from between your toes – if the venue has a sea swim.

POST- RACE KIT and EQUIPMENT:

  • Spare tracksuit
  • Three T-shirts
  • Warm top
  • Drink for after the race preferably coke as this helps kill any bacteria from the water and provides you with sugar.  Recovery drink.

SPARE KIT and EQUIPMENT (in the event of mechanical failure / breakage / loss):

  • Watch (if applicable)
  • Heart Rate Monitor (if applicable)
  • Trisuit
  • Swim Cap
  • Swim Goggles
  • Cycling Shoes
  • Running Shoes
  • Socks
  • Safety Pins
  • Water bottles
  • Sun Glasses

ONE MORE IMPORTANT TIP:

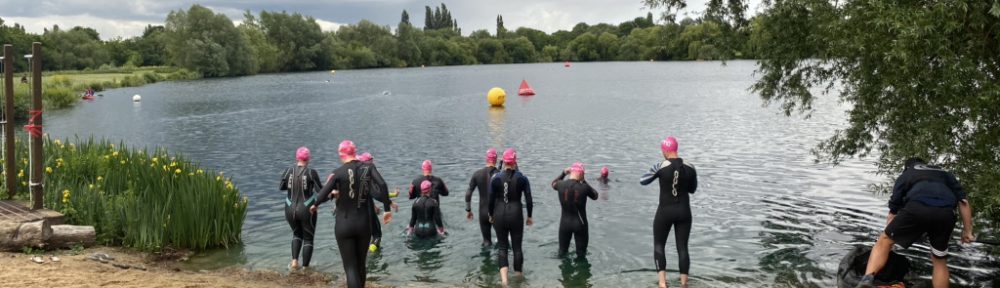
Make sure you look at all aspects of the race course, be it the lake / sea for the swim; the cycle route (always a good idea to actually drive round it); and the run (again drive round it if you can beforehand).

This way you will have no surprises on the type of terrain you will be cycling / running on and what hills / bends / turns / corners will greet you so that you can change your race pace accordingly. 

With the swim it is important to know where the marker buoys are and if there is a current or wind how it will affect the swim in order to keep within the buoys.

With all the above dealt with you should be fully prepared, enabling you to concentrate on your race, do well and most importantly enjoy it.

GOOD LUCK!

Coach’s Corner

Top tip for swimming

When going swimming always start with a warmup, start off slowly and build speed over about 8 –12 lengths and then do any drills before the main set.

By doing drills when you are fresh, you will not only perform them better but it will also then help your swimming in the main set!

Example Swim Session

  • Warm up with 200m – 400m
  • Drills – focusing on the catch – fists, little fingers, cow horns, normal hands (2 lengths of each)
  • Swim 4 X 200m (if you are a stronger swimmer or want to swim longer 4 X 400m) with 20 seconds of recovery between sets
  • After each 200/400m, swim 4 X 2 lengths fast with paddles with 15 seconds rest
  • 100m easy old English backstroke (or normal backstroke), to stretch out the chest muscles.

Coach’s Corner

Coach’s Corner

In this article, my first as Head Coach at Viceroys, I want to kick off the season with advice not to scare newbies off but equally not to be too light on those of you that are seasoned hard triathletes.  So where do we start?  There is so much information out there now about how to train, what equipment you should have and what races to do.

The thing I see most often when training people is how little preparation they have done before the session.  I am not talking about warming up or what you are wearing, although these are important considerations and we can maybe talk about these things in another post, but planning what the session will involve and what you are going to get out of it!

Some sessions especially club or group sessions you may go into them a bit blind i.e. you aren’t really sure what you are going to be doing other than riding for a certain period of time, or running at the track, or even swimming at the lake.  But having a bit of a plan of what you are aiming to achieve during the session and some quick checks to do before the session will make you get so much more from each session.

One of the most common fails, is checking your bike before each ride. 

How many of you do a M Check before each ride? Why is this important? 

For many they just grab their bike and may press on the tyres to see if the tyres feel a bit soft, before heading out.  Whilst this is part of the M check, if that is all you do then you are winging it every time you go out on a ride.  You could be setting yourself up for an incident.  Also, just because you think your bike is fine or you did a M check on your last ride (so you don’t need to do one again), you need to do it as things do loosen over time and use, especially if you are transporting your bike in a car.

Every single ride I have done with groups this year there has been an issue with a bike.  Normally, someone gets a puncture, but there have been many other issues that are totally preventable which a simple M Check, which takes 2 minutes or less, could have solved.

For those of you that don’t know what a M Check is, it literally is a check over the bike in the shape of the letter M which checks all the major parts of the bike to see if everything is working and in good order. 

M Check Guide

  • You start with the front wheel skewer (the axle that runs through the front wheel that connects your wheel to the front forks of your bike).  Check to see that it is tight.  Ideally the skewer should be locked tight in alignment with the forks.  However, I like to have the skewer facing backwards towards the pedals at 90 degrees so you can get your hand in it easy and quickly release should you get a puncture, and it is easy to then get the wheel off.  If you have disk brakes, then just lifting the front wheel and banging on the top of the tyre to ensure the axle is tight will suffice.
  • Next check the tyre firmness.  Notice I didn’t say pressure, as without a gauge no one will know what the tyre pressure is just by pressing.  What you are looking for is it to be firm.  Any softness you should then maybe get a track pump and apply some air to whatever tyre pressure you are comfortable to ride on and what the tyres can take.  (Clue the air pressure the tyres should be is written in embossed print on the side of the tyre).
  • Next check that the front brake is working by spinning the front wheel forwards and pulling the brake. 
  • Then put both hands on the hoods of the handlebars and press your bodyweight through the hoods.  What you are checking for here is to see whether the handlebars are tight.  You don’t want to find out that they are loose when you are going down a hill!

You have now completed the first part of the M shape – basically a straight line from the skewer to the handlebars.  This should have taken about 20 seconds!

  • Next you are going to move downwards diagonally following the downtube of the bike.  Are the water bottle cages loose?  Just give them a wiggle and check the screws to make sure that they are tight.  Do you have water or electrolyte in your water bottles?  I see many people who don’t go out with a bottle!
  • Then check the cranks (the bits that the pedals attach to).  Just see if you can move them laterally as you shouldn’t be able to.  Then check the pedals are finger tight.  You would not believe how many times peoples pedals come off on rides.  This should be unusual as when you pedal you are tightening the pedals as to loosen you must go backwards, but it does happen.
  • Then we are moving back up the seat tube to the saddle.  Push down on the nose of the saddle whilst pulling up on the rear of the saddle.  Then try moving the saddle side to side.  Any looseness will result in the saddle moving and if it does you need to obviously tighten it.  Once again this is quite a common occurrence for the saddle to move during a ride.  Check any saddle bags are zipped up or lights are tight and are working.
  • Now we are moving down the last part of the M Shape.  Check the rear tyre firmness.  Lift the rear wheel and spin it forwards and check the back brake works and finally check the rear skewer.

This is the M check; however, a few more quick checks will also help you have a hopefully nonissue ride!

Check the bolts on the outside of the large chain ring.  Some people won’t have any depending upon the type of chain rings, but if you can see five bolts on the chain ring just put the end of your finger onto them and see if you can twist them.  You will be able to tell if they are loose and if they are, use an allen key to tighten. 

Check the tyres for any glass, flint, or cracks by gently running your gloved palm (make sure you have gloves on), over the top of the wheel whilst spinning it forwards and closely inspect the tyre as you do so for any debris or cracks.  If you have anything, see if you can fish out the offending material and you could put a bit of superglue in any cracks. 

Finally, check the chain and make sure it is not too loose or worn.  Apply some oil if it is dry, squeaking or you haven’t used your bike for a while. 

All of this should have taken you about 1 – 2 minutes but will ensure you are less likely to have an issue and make your ride smoother and more fun.

In the next coaching tip, I will explore what you should be asking yourself about each training session to get the most out of it.  If you have any questions or ideas of what you would like to be included in the future, please let me know.

Happy training!

Ralph

Meet Our NEW BTF Level 3 Coach

Meet Our NEW BTF Level 3 Coach

Ralph Hydes is a BTF Level 3 high performance coach and has been coaching athletes of all abilities from total novice to Age Group internationals since 2000.  Ralph is also an Ironman University certified coach.  He has been the head coach at Thames Turbo Triathlon Club for the past 7 years and head swim coach at Wimbledon Windmilers. 

Having worked with juniors from 8 years old through to seniors in their 70’s, Ralph carefully considers the needs of everyone to get the most out of their performances whatever their goals and abilities.  He has trained over 25 individuals to represent their age groups at World Championships, two of which became World Champions, another to be European Champion, 3 Kona qualifiers, 2 UTMB qualifiers, multiple Ironman finishers as well as helping hundreds of others fulfil their goals from 5K’s to marathons and triathlons.

He has represented Great Britain himself at 8 World Championships. In 2006 Ralph came 7th in the World Duathlon Championships for his age group.  He has completed 2 Ironman events, 5 Ironman 70.3 events, 12 Etapes, a channel relay and multiple sportives.

Ralph’s philosophy is to help get the best out of his athletes using nutrition, strength and conditioning, as well as unique training techniques to become the best you can be with the time you have available to train.

Ralph Hydes - BTF Level 3 High Performance Coach
Ralph Hydes – BTF Level 3 High Performance Coach